Archive for the ‘Seeds’ Category

YMCA Seed Give Away!

Posted: March 20, 2016 in Seeds

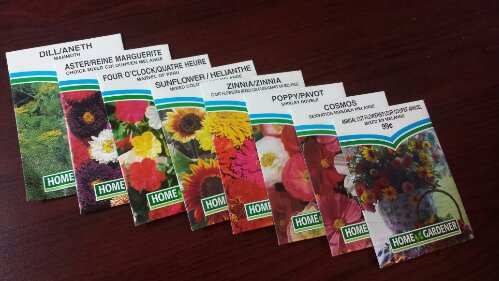
I was invited by the YMCA Connections and Immigrant Services to do a garden presentation/demonstration at the Farm, Food and Garden Event. My presentation/demonstration was on Kitchen Scrap Gardening -Don’t throw it, Grow it! however I thought this was an excellent opportunity to give some of my seeds away.
Here are the planting instructions for the seeds I gave away:

Chive Seeds:

Chives
Chives are an easy care, cool-season, cold-tolerant perennial that can be planted in early spring.
Growing chives right outside your kitchen door in containers and window boxes is really the best way to grow them.
They will grow in full sun or partial shade and once established, mature chive plants need minimal care.

  • Choose a 6-8″ (15-20cm) pot
  • Fill pot 1 inch from top with moist potting soil
  • Sprinkle chive seeds on top of the soil
  • Cover seeds with a thin layer of soil.
  • Keep soil moist until grass like seedlings appear.
  • Water young plants throughout the growing season.
  • Plants will eventually grow to be 12 to 24 inches tall and may spread a foot across.
  • The purple flowers are edible however even if you don’t eat them you may want to remove them or they will spread their seeds everywhere.
  • Harvest Chives by snipping the leaves off 2″ (5cm) above the base of the plant. New leaves will sprout to fill in the gap.

Chive Butter is a great way to preserve chives. Mix 2-3 Tbs of finely chopped chives into 1/2cup (1 stick) of softened butter. Use on baked potatoes or toasted bagels.
Chive Vinegar can be made by steeping whole chive leaves in your favorite vinegar. Chive vinegar is a natural for salad dressings and vinaigrette.

Note: When it starts getting cold in the fall, you can bring the entire pot indoors, and set in a sunny window to keep a supply of chives growing through the winter. Just be sure there are no bug hitchhikers before bringing inside.
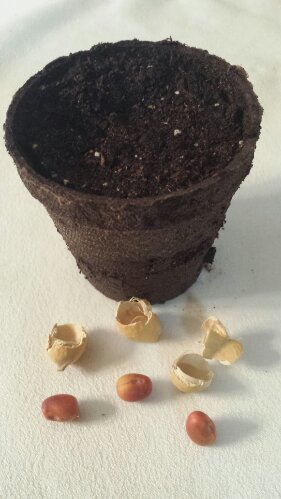
Bell Pepper Seeds:

Bell Peppers

Growing bell peppers is most commonly done in a garden bed. They grow very well next to tomatoes provided they are allowed enough space and sunlight. However, you can grow bell peppers in containers as long as they are big enough.

  • Plant two or three seeds per 4 inch pot filled with potting mix indoors. Keep the soil moist until seeds germinate. Once they sprout thin the seedlings to leave the strongest plant per pot.
  • Once seedling gets its 2nd set of leaves you can transplant into larger containers. Don’t set out your pepper transplants outside until night temperatures average around 13-16 degrees Celsius. (55-60 degrees Fahrenheit)
  • Choose a 2-gallon or larger container that is 14 to 16 inches deep. Make sure the container has drainage holes or drill 4-5 evenly spaced holes around the bottom of the container if necessary. Then use either coffee filters or some type of screen to cover the holes.
  • Fill the container with a mixture of two-thirds potting soil and one-third compost. Water the soil to dampen and allow it to drain.
  • Plant one pepper plants per container, digging a deep enough hole to hold the root ball. Tamp soil down around the plant.
  • Staking peppers will be necessary as the plants begin to take off. They can grow as high as 3 or 4 feet, so you need to give them some support. Place one stake in each container closely to the stem. If need be, loosely tie a bit of twine to the stake and the other end to the stem to keep it from bending over. Tomato cages will also work.
  • Place the container in a sunny location, providing 6 to 8 hours of sunlight daily. Turn the pot daily, if needed to keep the plant growing upright.
  • After the first fruit starts to grow, apply an amount of fertilizer along the sides of the plants. You can also let old coffee ground steep in water for a period and pour that directly on the plants. Crushed eggshells added to the soil will also help avoid blossom end rot.
  • Check the soil daily for moisture and water the bell pepper plants as needed. If possible avoid wetting the foliage or letting pot stand in water. Peppers hate wet feet!

Tip-If you are a smoker wash your hands thoroughly after handling any type of tobacco product and avoid using tobacco near plants. Bell peppers like tomatoes are susceptible to tobacco mosaic virus. Symptoms include yellow or mottled leaves and stunted growth.

Sugar Pie Pumpkin Seeds

sugar-pumpkin

An heirloom pumpkin, these Sugar Pie Pumpkin Seeds will grow a classic eating pumpkin that is especially good for pies and canning. Vines develop small slightly ribbed, bright-orange pumpkins that are 6″-9″ in diameter and have the sweetest flavor and finest texture for pies and casseroles. These are not grown in containers and should be planted in the ground.
Here’s how to do it:

  • Direct sow or transplant in late May or early June when soil warms up. Optimal soil temperature for germination is 25-35°C (68-95°F) or you can start seeds indoors during the first week of May.
  • Choose a sunny spot with fertile, well-draining soil and then dig in a generous quantity of finished compost and/or composted manure. Pumpkins are big greedy feeders. The secret to growing good tasting pumpkins is lots of POOP! Pile up manure into “pumpkin hills” about the size of a small pitcher mound and then sow the seeds 2cm (1″) deep. Sow 3 seeds in each hill. Seeds should sprout in 7-14 days. If you started your seeds indoors be sure to harden off plants before transplanting your seedlings into your pile of aged manure.
  • Pumpkins are 90% water so keep pumpkin plants well-watered, particularly in hot weather. Always water the soil, and avoid getting the leaves wet as much as possible because powdery mildew is almost always a problem here in the Pacific Northwest, especially when it comes to pumpkins. There are some mildew resistant pumpkin varieties out there but the sad truth is that they still get powdery mildew.  It just seems to happen a little later in the season than the non-resistant varieties. The pumpkins themselves will still turn out great even if the leaves are covered in powdery mildew so I don’t worry too much about it.
  • Pumpkins are mature when they have colored up well and their stems are crisp (about 110 days after transplant). For the best sugar content, cut the stem about 4cm (2″) or so from the body of the fruit. If the weather is dry, allow the pumpkins to cure in the field for 10 days, or in a warm room for 4-5 days.
What else can I say other than……..
Welcome to the Pacific North West, one of the best gardening places in Canada!

Fridge

PS-For those of you who feel like you missed out on some free seeds, don’t worry!
I’ll be doing several more seed giveaways with a variety of other seeds on my Guerilla Garden Facebook Page
so be sure and follow me!

I’m offering free heirloom pumpkin seeds to the first 50 people who stop by the Guerilla Garden Adventures booth located at the Eco-market in Sardis Park on Wednesday May 6th from 4pm-8pm (45845 Manuel Rd Chilliwack, BC.)
You will have a choice of either “eating pumpkin” seeds or “prize winning gigantic pumpkin” seeds for as long as supplies last. Not sure where you’re going to plant it? Well it is rumored that some people (not to mention any names) are already scoping out unused lots and other public spaces as potential guerilla garden pumpkin patch locations. I cannot for liability reasons condone planting on someone else’s property but I’m just saying…… FREE!……your choice of the following 2 types of pumpkins seeds:

EP – Eating Pumpkin Seeds

Sugar Pie Pumpkin

  An heirloom, these Sugar Pie pumpkin seeds will grow a classic pumpkin that is especially good for pies and canning. Vines develop small slightly ribbed, bright-orange pumpkins that are 6″-9″ in diameter and have the sweetest flavor and finest texture for pies and casseroles.
Matures in 110 days (Open-pollinated seeds)


GP – Gigantic Pumpkin Seeds

Gigantic Pumpkin

One of the largest varieties of pumpkin in the world, seeds from this and related strains are commonly used in pumpkin weigh-off contests. These heirloom giants (the largest fruit of any plant in the world), grow on very large plants, with vines up to 50′ long, so they require lots of room, full sun, and fertile soil to produce the giant pumpkins.
Matures in 110 days (Open-pollinated seeds).
I can personally attest to the fact that these gigantic pumpkins regularly grow to 50-100 pounds and therefore are not considered “Balcony Friendly”.  In 2013 I planted these pumpkin seeds very late in the year (July 1st) and my pumpkin still ended up weighing 74.2 pounds and came in 2nd place in the Operation Pumpkin Patch contest at The Sunshine Community Garden.

2nd Place Pumpkin_2013
Just imagine how big it would have been if I had planted it in May when I was supposed to. It is said that under proper conditions these pumpkins can weigh up to several hundred pounds and I believe it.
Not sure how to go about growing your pumpkins? Here are a few pointers…….

Pumpkin Growing Guide and Tips

Operation Pumpkin Patch Kit

Timing
Direct sow or transplant in late May or early June when soil warms up. Optimal soil temperature for germination is 25-35°C (68-95°F).  For transplants, start seeds indoors during the first two weeks of May. Be sure to harden off plants before placing out in the garden if starting indoors. Note: Master Gardeners will tell you that pumpkin transplants should go into the ground no later than June 15th but feel free to push the boundaries.

Growing
Choose a sunny spot with fertile, well-draining soil and then dig in a generous quantity of finished compost and/or composted manure. Pumpkins are big greedy feeders. Like my friend Tim Dixon says (who came in 1st place at the Sunshine Community Garden pumpkin contest) the secret to growing a prize winning/ good tasting pumpkin is lots of POOP! Pile up the manure into “pumpkin hills” about the size of a small pitcher mound and then sow the seeds 2cm (1″) deep. Sow 3 seeds in each hill. Seeds should sprout in 7-14 days. If growing gigantic pumpkins then pull out (or transplant) all but the strongest plant.

Fertilization
All pumpkins grow male flowers first, then the female flowers are produced. The female flowers have tiny fruits at the base of the petals and require pollination by bees. However, if no bees are to be found use a small paintbrush and gently “tickle” each flower on the vine. This is like artificial insemination for plants.

Watering
Pumpkins may seem substantial but they are 90% water so keep pumpkin plants well watered, particularly in hot weather. Always water the soil, and avoid getting the leaves wet as much as possible because powdery mildew is almost always a problem here in the Pacific Northwest, especially when it comes to pumpkins. There are some mildew resistant pumpkin varieties out there but the sad truth is that they still get powdery mildew.  It just seems to happen a little later in the season than the non-resistant varieties. A homemade organic spray for powdery mildew can be made however I never got around to spraying my pumpkins at all and if you look at the pictures above the pumpkins themselves turned out great even though the leaves are covered in powdery mildew.

Gigantic Pumpkin Tips
When growing gigantic pumpkins for bragging rights you will want to feed weekly throughout the growing season with a fish or kelp based fertilizer. Also the pumpkin will grow larger if you keep only one fruit per vine. As the pumpkin develops, try to gently encourage it to grow at a 90° angle to the vine itself as the largest pumpkin varieties will grow on their sides and they will end up looking like a half deflated balloon.

Harvest
Pumpkins are mature when they have colored up well and their stems are crisp. For the best sugar content, cut the stem about 4cm (2″) or so from the body of the fruit. If the weather is dry, allow the pumpkins to cure in the field for 10 days, or in a warm room for 4-5 days.

Here’s to The Great Guerilla Garden Pumpkin Adventure of 2015!


Killer Grape Tomato Prices!

Posted: March 1, 2015 in March, Seeds, Vegetables

The Grape Tomato Seed Adventure

A criminal/immoral idea that could potentially help you with your grocery and seed buying budget!
Guerilla Gardener wanted for suspected involvement and organization of the famous Tomato Caper of 2015!

Warning-The Grape Tomato Police could be looking for Guerilla Gardeners with ties and possible involvement in the rumored Grape Tomato Capers of 2015!

I love grape tomatoes but the price at the grocery store is killing me and quite frankly paying for them is starting to cut into my seed buying budget. As for the quality of store bought grape tomatoes…..well when they’re good, they’re very good……and when they’re bad, they are simply horrible! Paying for an expensive plastic container of little, tasteless, sour, wrinkled, red rubber balls is usually not what I had in mind when buying grape tomatoes at the supermarket, so whenever possible I try to liberate one out of the container and do a taste test before buying any. Even if they pass the taste test, the lifespan of a store bought grape tomato is so short that it doesn’t take very long before they start to get all wrinkly. After paying top dollar I find this more than a little offensive so I’ve added some grape tomato seeds to my seed buying list.
Since I’m trying to adhere to a self imposed seed budget I tried surfing the internet to try to seek out some deals on grape tomato seeds. As a Guerilla Gardener I was pleasantly surprised to discover that buying seeds in packages wasn’t my only option. Apparently there are some suspected fellow guerilla gardeners out there who have had great success using seeds harvested from store bought grape tomatoes. From a taste point of view, nothing beats the taste of a homegrown tomato and I couldn’t help but think that from a financial point of view this idea could help both my seed and grocery budgets to go just a little bit further.
Now, it just so happens (and I speak from experience) that if you mention this gardening idea to a Master Gardener they will tell you a bunch of technical stuff like it’s a hybrid, it won’t grow true to seed, it won’t taste good, blah, blah, blah.
As a Guerilla Gardener trying to work within the seed budget, my opinion is that if you already bought some good tasting grape tomatoes and there are a few wrinkled ones in the bottom of your refrigerator or rolling around on your counter, what do you have to lose? This especially holds true if you have plans to plant tomatoes on property that does not belong to you.

Tomato Plant hidden between some cedars along the back fence at Strata complex

A tomato plant hidden between some cedars along the back fence at Some-Strata-Property.

The internet consensus on growing grape tomatoes from supermarket varieties is that the Santa Sweets® brand of grape tomatoes (the containers with happy little tomatoes wearing Santa hats on the label) seems to work the best. When I grocery shop and can find this brand of grape tomatoes in the supermarket I usually buy them because they are always very sweet and they always pass the taste test. Now, if you happen to live in the U.S.A you can buy these plants already started from the Santa Sweets® company website but they will cost $32 (plus shipping and handling) for 8 plants. However, even if you had the money to waste, you still could be totally out of luck trying to obtain these plants as the company does not ship live plants to Canada. As a Guerilla Gardener living in Canada, who is always open to new adventures the idea of trying to grow a grape tomato plant from my favorite brand of supermarket tomatoes seemed like a brilliant money saving plan that was going to help me to get the most out of both my grocery and seed budgets. However, there’s a bit of a hitch. Apparently the Master Gardener’s concerns are the least of my problems because it turns out that there may be some criminal/moral issues to this money saving seed plan. It seems that there is some kind of copyright/trademark/patent tomato-rule-thing going on with this particular brand of tomatoes. The Santa Sweets company grows only proprietary varieties of tomatoes such as the Santa Sweets® grape tomatoes. The company boasts that this is an exclusive “100% Pure Santa Variety (F1)®. This simply means that by law they are the only ones allowed to grow them and it has been highly recommended that I find out what kind of fine/legal costs/jail sentences might be incurred before trying to use the seeds from some Santa Sweets® grape tomatoes. After checking all the trademark/copyright/patent information out thoroughly I cannot in good conscience condone or recommend using any store bought tomatoes for seed harvesting, no matter how good an idea I think it may be. As a matter of fact, I am not willing to assume any responsibility or liability for anyone who decides to embark on their own Guerilla Garden Tomato Adventure. Just saying…if you get caught doing this you are on your own.
However….. if you are willing to take the risk of the Grape Tomato Police possibly breaking down your door and are willing to assume all liability, responsibility or legal/financial implications for your own guerilla gardening actions then according to what I’ve read here’s how you would go about embarking upon your own…..

Guerilla Garden Grape Tomato Adventure!

Step 1
Look around in your refrigerator or your counter for a spare grape tomato. If you bought a bunch and there’s a wrinkled one be sure to choose it-apparently, they seem to sprout better for some reason.

Step 2
Fill a 10-12” pot with indoor potting soil.

Step 3
Squish the grape tomato with your fingers and try to separate the seeds from the pulp.
Note-Kid’s love this job! Discard the pulp and spread the seeds evenly around on top of the soil and then cover with about 1 inch of dirt.

Step 4
Check your tomatoes everyday for water.
Keep the soil moist (do not let it dry out!) and in a week or two you will see a bunch of seedlings pop up. When they are big enough to grab, separate them and then transplant them into different containers. Note: The Brooklyn Seed Company has a really good tutorial on making self watering containers out of old pop bottles. These work great for those people who are not known to adhere to a strict watering schedule and would rather use their garden budget to buy more plants and seeds than spend it on containers.

Step 5
Harden the plants off and then plant them outside in the garden. Before transplanting to the garden be sure to fill the hole with rotted manure or compost. Tomatoes love this type of crap!

Step 6
Pick and enjoy the taste of your homegrown grape tomatoes. Note-if you used a Santa Sweets® grape tomato you also might want to keep your eyes out for the Grape Tomato Police…..just saying!

Additional Tomato Growing Facts and Tips for Success:
– Start tomato seeds indoors 6-8 weeks before the last anticipated frost in your growing area. In other words if you live in the Pacific North West and you don’t have some tomatoes started you should be starting them now!
(March 15th is ideal)March Guerilla Gardener-You can also plant tomato seeds directly outdoors in May but your yield will be limited.
-Any tomatoes (not just grape tomatoes) will work using this growing method but organic and heirloom supermarket tomatoes are more likely to grow true to seed. FYI-be aware that some tomato varieties might also have a copyright/trademark/patent tomato-rule-thing, so try this at your own risk.
-Choose the best tasting tomatoes but for a variety of reasons don’t be surprised if the tomatoes that you produce do not look like the ones you bought. Just remember, you’re most likely using tomatoes that you were going to throw out anyways, and as a guerilla gardener you should never look a gift tomato in the mouth.
-Some (but not all) supermarket type tomatoes are indeterminate –in guerilla garden simple speak they don’t usually do well in pots as they can grow quite large so they do best when transplanted directly into the garden. Also be aware that they may need a heavy duty trellis or a fence as a regular tomato cage usually doesn’t stand a chance of holding up most indeterminate tomatoes. Here’s the catch, you will most likely have no way of knowing if they are actually indeterminate. If space is an issue, just remember it’s only a old wrinkled tomato anyways so it’s worth trying to grow it in a large pot.
-When transplanting tomatoes outside (approximately the end of May/early June) place them where they will receive 6 or more hours of sun.
-When watering tomato plants apply water directly to the roots and try to keep water off the leaves. If possible plant under the eves on the southern side of the house to keep the rain off the leaves as well. This lessens your chance of blight.
– Keep your tomato plants well watered. Tomatoes are approximately ninety percent water and if they are not watered enough the tomatoes will end up being shriveled and sour.
-If you don’t see any bees or butterflies around the little yellow tomato flowers then pollination might be an issue. This means that you won’t get very many tomatoes. You can solve this by taking a Q-tip or a small (unused) paint brush and start poking it in all the flowers. This kind of works like artificial insemination for plants. Or if you are like me you can just go all guerilla gardener and grab your tomato plant occasionally and give it a shake to distribute the pollen and then give it a good talking to. Either way pollination will take effect and you will be rewarded with more tomatoes.

My only dilemma now is just what type or brand of tomatoes am I going to buy from the supermarket for my Guerilla Garden Grape Tomato Adventure.

PS-I know what you’re thinking;
When it comes to tomatoes
Does she, or doesn’t she?
Well, only my accomplices will know for sure!

GG_water-cart_Grey

While cleaning out the junk drawer in my kitchen I found a mystery seed that my ninja shoe wearing accomplice acquired several years ago while vacationing. I think she mentioned that it had beautiful flowers.

Mystery Seed Pod

Mystery Seed Pod

What’s the name of plant?
I have no idea and my accomplice liberated the seed pod from a public space so she wasn’t about to ask.

What province, state, or country did the seed pod come from?
For legal reasons, it’s best not to say.

Will it bloom?
I don’t know if it will even sprout after kicking around in my junk drawer for several years.

Does the shell need to be cracked open prior to planting?
Not sure, but it kind of looks like a peanut shell but the outer shell is a lot harder. I cracked it open and extracted the 3 hard, orange seed pellets from inside and planted them in some seed starter mix.

Mystery Seed Pod Contents

The Mystery Seed Pod is cracked open and the very hard orange pellets are ready to be planted.

AND NOW WE WAIT TO SEE IF ANYTHING HAPPENS!

Ever since the poinsettias overstayed their Christmas welcome and were hustled out the door I have been feeling not quite right. Upon deep reflection I realize it’s not guilt, I just seem to be suffering from Plant Seed Acquisition Syndrome (P.S.A.S.). Luckily enough (or unluckily enough judging by the occasional look on my husband’s face) I happen to work at Little Mountain Greenhouses where I can easily get my daily plant/seed fix and make myself feel better. Some say it’s like the drug addict working in the pharmacy but I prefer to think of it as type of horticultural/shopping therapy. I just have to keep in mind that although my imagination and love of plants is unlimited, it is only the middle of January and my townhouse and cash ARE limited.
So as a part of this week’s Plant Seed Acquisition Syndrome (P.S.A.S.) treatment I bought a 6″  White Kalanchoe for my living room.

White Kalanchoe

Flowering houseplants are an all natural anti-depressant and play an important part in Horticultural Therapy. Kalanchoe plants come in a variety of colors, bloom for weeks and make a great inexpensive gift. This one was found on a discount table with a $5 price tag and rumor has it that having a Kalanchoe will help to relieve the symptoms of Plant Seed Acquisition Syndrome! (P.S.A.S.).

To help out with additional symptoms of Plant Seed Acquisition Syndrome (P.S.A.S.), I sometimes hang out in the primula greenhouse at work. So far I have been able to resist buying any primulas even though they are on sale – 7 plants for $9.99. Although to be honest I don’t know how much longer I can hold out!

Spring Primula Greenhouse

It’s only January here in the Pacific North West, but at Little Mountain Greenhouses it’s looking a lot like Spring!

As for the seeds…..well let’s just say that it’s too early to be choosing what I’m going to be growing yet because there are still several companies that have seeds on route to the store.

McKenzie Seed Display

McKenzie Seed is just one of many seed companies that Little Mountain Greenhouses carries.

Also I’m thinking that maybe before buying any new seeds I should gather all the packets left over from last year that have been stashed around the house, in the freezer and various junk drawers. I can’t remember what kind of seeds or how many seed packets I have left but I do seem to remember some paper bags of vegetable seeds in the garage that I harvested from my community garden plot. I will need to retrieve them before my husband throws them out! It should be an impressive amount of seed once gathered up…… especially for someone who lives in a townhouse. It’s a fact, every spring I suffer from Plant Seed Acquisition Syndrome (P.S.A.S.) and I know I will not be able to resist the urge to buy more seeds. So as a part of my Guerilla Garden  Horticultural Therapy Plan I have been thinking of ways to use up some of my old seeds so I can justify (even if it’s just in my own mind) the buying some new seed packets. What can I say……I’m thinking that there just might be a Seed Bomb Making Adventure in the foreseeable future!

Guerilla Garden SeedbombBombs Away!

F.Y.I –  L. Castro
I know you were most likely worried about the poinsettias after reading about one of my previous Guerilla Garden Pointsettia Adventures but I can assure you that this year no poinsettias were harmed prior to, during, or after this post. As a matter of fact this year they were rescued by a fashionista friend on garbage day and taken to a good home!

What happens when seed packets get wet!

Posted: December 18, 2014 in Seeds

The greenhouse roof at work leaked and soaked the Nasturtium seed packets…lol.

Nasturtium-seed-packet-sprouting


Seeds for Seed Bombs
As posted last week seeds were on sale for 20 cents a package at the Home Hardware in Chilliwack. So I bought 10 packets of assorted seeds with the intention of making seed bombs or to potentially sprinkle on some unused piece of land that is in dire need of a Guerilla Garden Makeover. My seed choices for this future Guerilla Garden Adventure are as follows:
Mixed Asters
Four O’clock Flowers
Mixed Sunflowers
Giant Zinnias
Shirley Double Poppies
Sensation Mixed Cosmos
Mammoth Dill
So here’s to a potential seed bombing coming to an unused piece of property near you!

Seed Sale!

Posted: September 26, 2014 in Guerilla Garden Shopping, Seeds

image

Seed sale at Home Hardware in Chilliwack!
For 20 cents a packet I’m going to put some in my freezer for next year.

Cucamelons

Besides being called a cucamelon the other known names for these tiny little morsels include mouse melon, Mexican sour gherkin, Mexican miniature watermelon and Mexican sour cucumber. I ordered the seeds on line but I think I should have started them inside earlier instead of direct sowing as they are just now getting fruit. They have an intense cucumber/ lime infused flavor and are very crunchy and delicious! The bonus is they are much easier to grow than regular cucumbers, they are ignored by pests and are resistant to drought (or a lack of watering). Cucamelons are also said to make excellent pickles but I don’t think I will have enough fruit to fill a jar because I started them from seed too late in the year. However, cucamelons (Melothria scabra) are heirlooms so I’m going to try and save seeds and start them indoors earlier next year because they are so tasty!

 Hawaiian Current Tomatoes

 Hawaiian Currant Tomato seed packet description:
Produces clusters of tiny, round, pea-sized red currant tomatoes. Prolific yields all season long. Can be left to sprawl or be grown in hanging baskets. A super sweet and tasty treat.

In March I ordered some Hawaiian current tomato seeds from Salt Spring Island Seeds,  planted them in seed trays, then proceeded to kill all but 3 of them off due to neglect and lack of water while making a career change. The good news is that they are just as tasty as promised and the ones that have survived are loaded with little tiny tomatoes. This is a relief because the company has sold out of all the Hawaiian current tomato seeds and there are no more local seeds available. Since all the seeds from Salt Spring Island Seeds are untreated, open-pollinated and non-GMO I’m thinking  I should be able to save some seeds to grow these tasty little tomatoes with next  year.